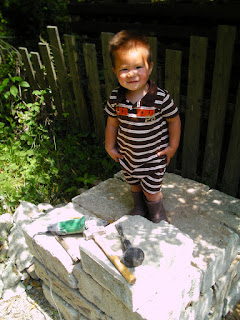
I started hauling rocks up from the bottom field last winter. I laid them out in a meter wide circle, tried to make them fit, tore them down and did it again. Then the earthquake came and everything was on hold. But my neighbor decided to let his friends dispose of their earthquake damaged tuff wall blocks on a corner of his property. I thought- wow, those would work really well to make a base for my oven...
 At first, I tried using them the way they were, with jagged broken ends and all. But my neighbor's friend gave me the idea to cut the stone into rectangular blocks. I didn't even think about cutting the blocks before, but tuff is basically just a solidified volcanic ash. You can scratch it with your fingernail (but it hurts). So out came the disc grinder with a diamond blade. It cuts tuff like a hot knife through butter. But the problem with a grinder is, it only cuts about 25mm deep. But this gave me the excuse to buy a cold chisel and a rock hammer! Woo Hoo! Put them in the slot made by the grinder, tap it a few times, and off it comes, pretty as could be. Soon I had a base about 60cm tall. It is a pretty good working height. Low enough to be stable, and high enough to work without laying down on the ground to see inside.
Next, I filled the cracks with sand, and laid a 2cm thick bed of sand over the top of the base. Then I laid red bricks on the sand, dry fitting them tightly. This will be the floor of the oven.
Then, I made a sand castle (well, it looked like Homer Simpson's forehead actually) on top of the bricks with my daughter's help. It collapsed a few times, but we finally came up with the solution of having the hose dribble into a saucer shaped depression at the top while we worked. That kept the sand moist enough to hold its shape. Before the sand castle could dry out, we covered it with a plastic bag. This sand dome is just to hold up the cob we will build around it. After it has dried a little, we will remove the sand through the door to create the void inside.
That was when the really fun part started. We pitched three buckets of sandy clay onto a blue tarp, watered it, and began to dance on it barefoot. The clay stuck to our feet, squeezed between our toes, and splashed up onto our clothes. It was great fun. When the consistency was just right- kind of like warm modeling clay, we began to make 8-10 cm balls of it and slapped them around the plastic covered sand dome. It took three mixings of cob to completely cover the dome. This layer of cob is dense- no straw in it- so it can absorb a lot of heat when we fire it. I poked a lot of shallow dents in it with my fingers so the next layer would have something to grab on to.
Now we went back to the tarp- three more buckets of clay soil and a bit more water than before, and we had cob with the consistency of toothpaste. Then we added a five gallon bucket of rice hulls and mashed them in. The rice hulls add a lot of volume, and drastically reduce the density of the cob, while increasing the tensile strength. We slathered this over the dome as well, about 10 cm thick. This is the insulation for the dome.
 |
| Anybody can help make cob! |
And finally, the finishing layer. We mixed up yet another batch of cob. The boy made it rather thin by adding too much water. But that is OK. Then we added some cattail fluff to the mix and stomped it in. Hopefully the fluff will give the clay enough tensile strength to keep from cracking. We then frosted the rice hull cob dome with about 2 cm of the cattail fluff cob. Later, when it dries out just a bit, we will polish it up with some smooth plastic until it is smooth as silk.
 |
| Last year's cattails look pretty shaggy. |
 |
| Let it dry and I'll cut the door out soon. |


Wicked. I'm jealous. We had a cob oven at the Golden Rule, and I really enjoyed the couple of times we used it. I am confident that if I built my own I'd use it a lot... So you're inspiring me!
ReplyDeleteIt only took a long afternoon.... Alten could help stomp the cob too!
ReplyDelete