Monday, October 31, 2011

Planting Jinenjo (Dioscorea opposita )

I have no idea if I did it right, it is just an experiment.

First, I lay a piece of Moso bamboo I had split and knocked the nodes out of and checked the length.

Then, I dug a trench in the side of my garden bank and put the bamboo trough in it.

Then I filled the trench with soft soil, being careful to avoid any rocks or roots.

At the top of the bamboo trough, I put the top 15cm of jinenjo root my friend gave me, and carefully replaced the soil around it.

The theory is that the root will grow down the bamboo trough, and I won't have to dig a one meter deep hole next to the root just to get it out without breaking it.


**** 2012/05/06**** The embankment was destroyed by wild boars, and I am afraid the jinenjo were as well.

Saturday, October 29, 2011

Rice Threshing 2011


My Rice- Koshi-Hikari
Well, I did it. And it feels good. A bit embarassing, but still pretty good.

As you know, this year I grew some rice. The kids and built the paddy, planted the rice, watched it grow, and harvested it.
And now it is threshed and de-hulled.
Here is the story in pictures.

I took the rice off the drying racks and carted it up to the house. That way, I could sit in the sun and work threshing the grain from the straw. I tried a number of ways. I beat it with a stick. I walked on it, but the best method by far was to grasp a few stalks in my hands, and run my fingers from the base to the head. The kernels just popped right off. Of course, this method will be too labor intensive if I ever grow rice well enough for a decent harvest. But for my harvest... Meh.


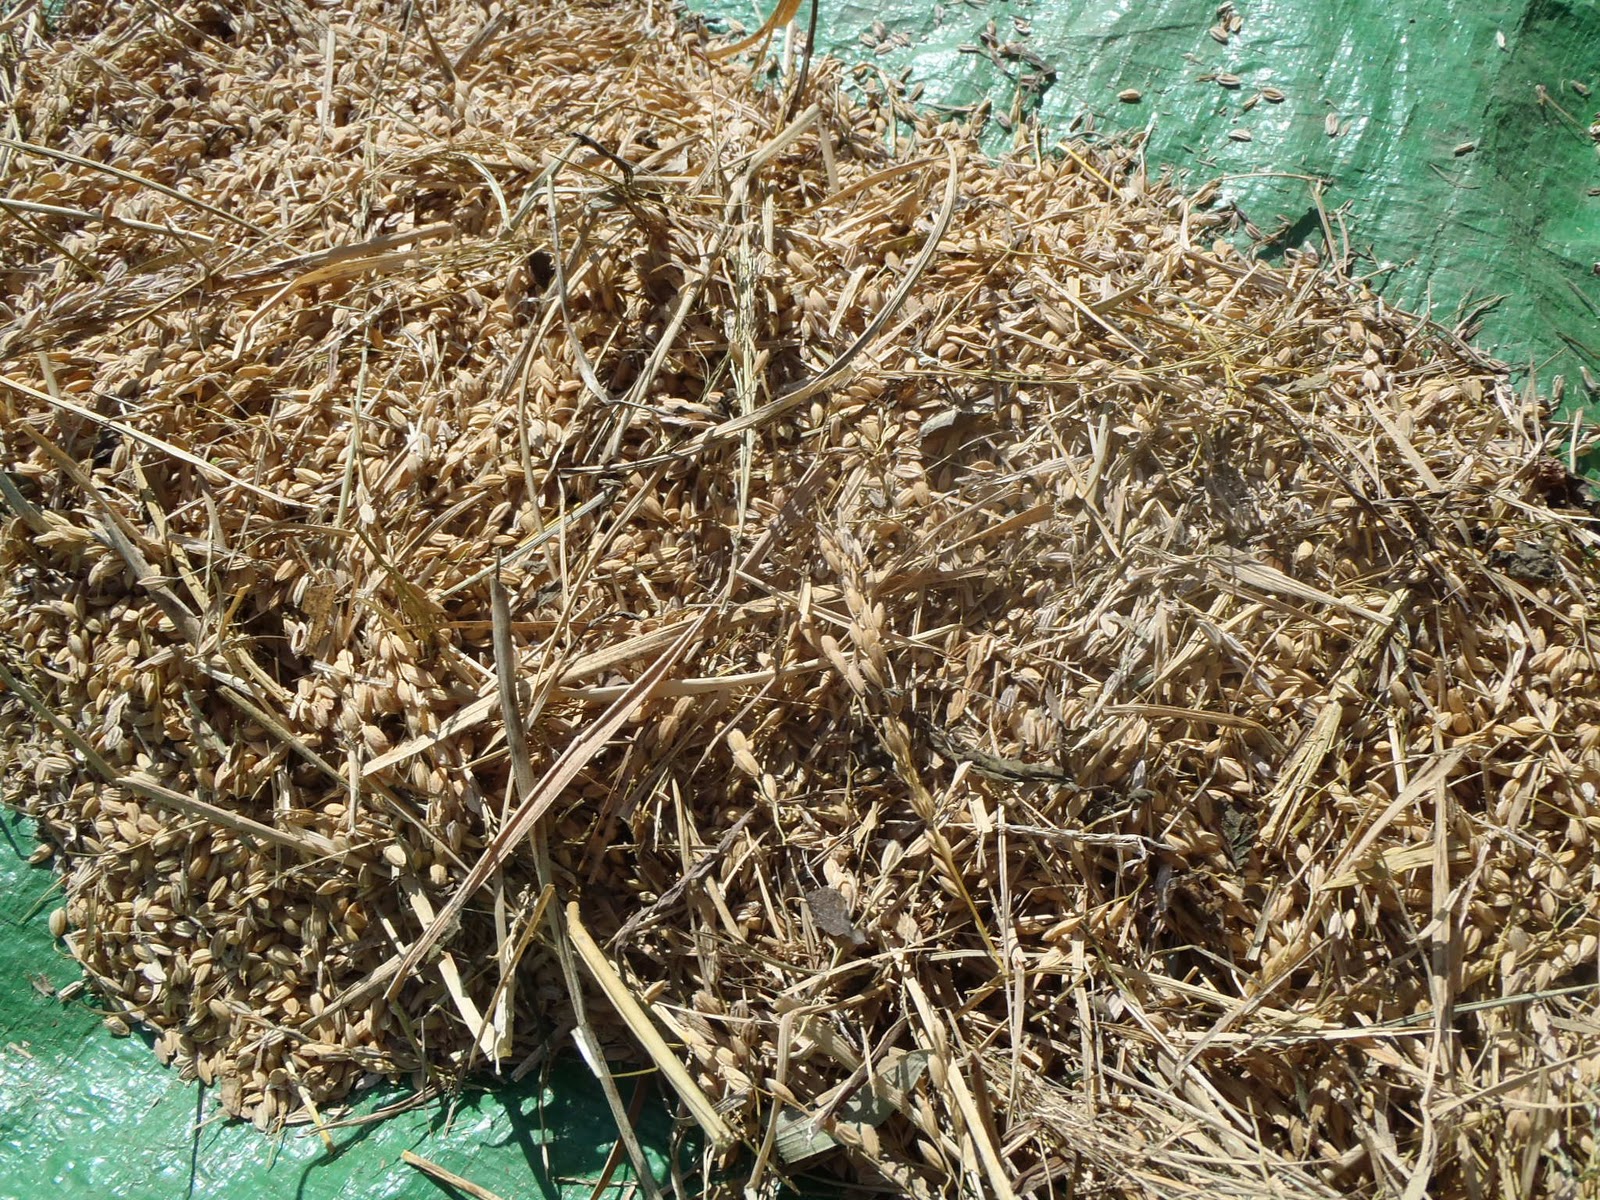
Here we have a mid threshing shot.
And a closeup of after stripping the grains. Lots of empty hulls and small bits of straw. I then spent a few minutes picking up handfuls of the grain and chaff, and rubbing my hands together to separate them.

Then I winnowed the grain by the time honored method of throwing it up in the air and letting the breeze carry away an alarming amount of empty hulls and straw. After gathering it back up, it looked like this.

And so I weighed it. 1500g. of unhulled rice. Hmm.... 25 square meters, 400 plants, 1500g of rice.... Oh, did I forget? I took it to the big machine in town to have it polished up and the hulls removed.

It came back at 1000g. Yes, my yield was 40g/ square meter.

So if 1 acre equals 4047 square meters, I would have grown  161.88 Kg. of rice, or  356.9Lbs...

(in 2001, the US average rice harvest/ acre was 6374 Lbs...)


All the more incentive to do better next year.
But I will enjoy eating this rice!

My Precious.....

Wednesday, October 26, 2011

Planting Fava Beans the Japanese Way

This year, I thought I would try planting some things the way they say to do it on the seed packets here in Japan. Minus the chemical fertilizers of course.
It started like this after pulling all the weeds and making a compost pile in the corner of the garden.


And with a generous helping of this


donated by them,


I double dug a row one meter wide and six meters long. 
I used a stake and some string to mark the edge, and with my Japanese hoe, or kuwa, I piled the soil from the sides into the middle to make the une, or raised bed. The seed packet called for it to be 60cm across the top.


Ok, what next?


Next, with my helper,


We smoothed out the top with a section of pipe,


And voila! A prepared bed for planting.
(I made another one next to it just after this picture)


After we let the beds rest for a week and let the lime mellow out, I planted two fava beans each, 50 cm. apart.
When you plant the beans, make sure to put the black ends down, and push the seed down until it is just hidden in the soil. 
Here we plant them in late October-Mid November. The packet recommends putting some bamboo branches along the north sides of the bed to provide some protection from frigid North winds. 

I'll keep you updated.


Three Leaf Akebia

Akebia growing in a friend's backyard

Just starting to split

Open it up and enjoy the sweet pulp. 
I love wild food. And this is one of my favorites! Akebi. In this case, it is an "Ishi Akebi" (stone akebia) as opposed to the "Murasaki Akebi" which is purple. Sweet pulp, seedy as a passionfruit. But you can just eat the seeds, no problem there. The only problem is that they grow so far up in the trees! I was lucky with this one. My oldest son was walking to the meeting place to go to school, when he stopped, pointed at the ground, and said "Daddy! Akebi!" Sure enough, there were two overripe ones that dropped off the vine laying on the sidewalk. So I looked up, and there were a bunch of them, some within reach! Hooray!

Akebi enjoy growing on the edge of the forest, which around here means along the roadside. So around this time of year, I keep an eye on the ground, looking for dropped fruit. Then I make a note of it, and know where to come back to in the future. 

Friday, October 21, 2011

Dioscorea opposita, or Japanese Mountain Yam

Dioscorea opposita 
My farmer friend down the mountain grew some "yamaimo" seeds two years ago, and as I rode by on my way to work, I stopped to watch him dig them out. That he gave me one was just a super lucky bonus!
I am kicking myself that I didn't take a picture of the whole root, which was as big as my arm at least. This thing was huge!
I peeled the root, since Mayuho can't touch it because it makes her itchy. But I am fine with it. So anyway, I cut the bottom third off, peeled it, and began to grate it over a mixing bowl.


It was beautifully gooey. Just wonderful!

Then we put some soy sauce in, and dumped it over a big bowl of brown rice. Wow, that was sooooo good!

Sunday, October 16, 2011

Open Sandwich, Ulrich Sandwich, Bread Baser, or Tartine

 I love sandwiches. I love grilled cheese sandwiches. 
But I only had one slice of bread and about 3 minutes....
Behold with all proper awe and adulation, 


THE OPEN FACED GRILLED CHEESE SANDWICH!
Single slice of bread, buttered on both sides, some cheese...

Flip it quick
Browned cheese.

Necessity is the mother of invention.

Friday, October 14, 2011

The Darkening...

Amending soil with rice hull charcoal
As you can see, the sandy soil in my garden is on the left. I put about 5cm of rice hull charcoal on the soil as you see on the top right, and mixed it in with my fingers and a small garden trowel (bottom right)
That is quite a bit darker. I am looking forward to see how it does with fava beans in it next month.

A friend of mine advises to soak the hulls in urine for a few days to let them get some nitrogen in them. What do you think?

More Rice Hull Charcoal

Being the peak of the rice polishing season, I can get bags and bags of rice hulls. So I have been using them to make more rice hull charcoal for my garden.

I'm hoping to experiment with using sawdust sometime. I think that perhaps very rough sawdust, like from a chainsaw, might work. I don't know if the fine dust from a sawmill would though...

Anyway, enjoy!


Thursday, October 13, 2011

The One That (Almost) Got Away

After my watermelon patch gave up the last watermelon, I kind of... well,  totally stopped tending it. The vines kept growing all over the place, but the weeds were growing as fast or faster.
I noticed yesterday that the weeds were about to set seeds, and I thought "One year's seeding is seven years weeding" so I rolled up my sleeves and dug in. Holy cow there were a lot of weeds. And I got in there just in time. Flowers everywhere, and a few plants had immature seed heads. Whew!

Then I found my little friend. The weeds must have sheltered him from being seen by the crows. I'll be digging into this one for lunch.

Monday, October 10, 2011

Neighborly Rice Advice

The 2012 Paddy Plan
My neighbor, whose family has been growing rice in the area for (I think) seven generations, gave me some advice.

1. Use the paddy I grew in this year as a holding and warming pond next year. This means I will have to line it with either plastic or clay, and make another paddy next to it. But hopefully the water will be much warmer and the plants much stronger. I think I will use clay to line it, and darken the red clay with some rice hull charcoal.

2. Remove some of the soil and buy some real paddy soil. This is not a real option, since I am so cheap. However, there is a place up the mountain where a cattle farmer regularly scrapes off the dung and top layer of soil in his barnyard and dumps it in a ravine. I claim that as mine. The new paddy will be a bit deeper than the previous one, lined with clay, and filled with this composted manure and soil. My neighbor recommends 30cm of this. But he also said that I could just gradually increase the depth 2-3 cm each year until I get a respectable harvest. So I am aiming at 5cm for 2012. Much better than the 0cm I had this season...

Sunday, October 9, 2011

Rice Harvest 2011

My helper and his remote controlled tank.
I did it. Finally harvested the rice.
I have never seen such a weedy rice paddy before.
And the results are pretty disappointing. But- I am a firm believer in learning from mistakes. So I am happy.

So, to harvest the rice, I needed a "kama" or hand sickle, a handful of long rice straw to bind the sheaves, six bamboo legs and a thicker crosspiece for the drying rack, and... that was all.
Grasp the stalks in the left, and cut with the right.

So I got into the paddy, which I had dried out some time ago. I put my foot near the rice plant to be cut and using the sickle cut it off about 5cm from the ground. There are about 20 or so stalks in each clump. I did the one next to it, and the next.... until I could no longer easily hold them in my hand. Then I took three or four long rice straws and wrapped them in a band around the bundle near the base. After wrapping it around, I twisted it 3-4 times, and then pushed the twist through the band. Then I did the next one, and so on. I ended up with about 20 bundles.
Real farmers don't have to steady the sheaves with their legs. But it sure makes it easier.
Embarrassing photo of more weeds than ever before seen in a mostly harvested rice paddy.

Next, I built the drying rack. Basically make two tripods and balance a long stick across them. I made mine of bamboo.
And finally I hung the bundles on the rack to dry them.
Drying rack in harvested paddy.

I will be surprised to get enough rice for one family dinner out of this harvest. But I don't mind. It is all experience.
My rice.

Wednesday, October 5, 2011

Squash Surprise!

So we wanted to try the squash I grew in the garden this year. The wife can't cut squash- they are too hard for her. So yours truly tackled it and soon split it with our heaviest knife. So far, so good. I scooped the insides into a shallow dish- since I wanted to roast the seeds. Suddenly, little white jumping larvae were boiling up out of the squash innards in the bowl! The wife was seriously grossed out and left the kitchen, telling me to cover the bowl or put hot water on it, or to just "DO SOMETHING!" So I put them in the microwave and zapped them. It worked. But as you can see, a few escaped to the floor. Once you could disassociate them from being inside food you wanted to eat, they are kinda cute, and funny when they jump.
A few minutes later, the boys and I were on the sofa when we saw a pair of them jumping across the floor. So I took a video. Those little buggers could jump about 20cm!


Tephritidae are a kind of fruit fly. Here in Japan these are called "Kabochamibae." Lit. Pumpkin Fruit Flies. They do a lot of damage to squash here. The adults look a bit like small wasps, and they lay eggs on or just under the skin of the squash. The larvae eat their way to the center and then go to town on the soft inner pith.

I checked our squash very, very carefully, and found no damage to the meat of it. So I scraped off an extra few millimeters and we cooked and ate it. The same with the seeds- none had any damage. They just were eating the connective tissues around the seeds apparently. Maybe they would eat into the meat and seeds if they were older. But anyway, it was pretty good. No wonder the flies liked it.

The next squash I will open up outside to spare the wife some distress.

So the way I made the roast seeds was to:
1. wash the seeds in a colander until they were clean
2. Boil them in fairly salty water for 10 minutes.
3. Put a dollop of sesame seed oil on a shallow baking dish, and spread the seeds one layer deep.
4. Sprinkle with salt and roast them at a medium high temp until they were just about to turn from chestnut to black.

Man, they were so good.